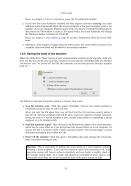
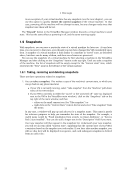
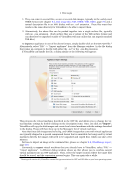
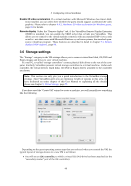
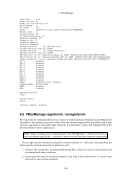
6 Virtual networking 6.3 Network Address Translation (NAT) Network Address Translation (NAT) is the simplest way of accessing an external network from a virtual machine. Usually, it does not require any configuration on the host network and guest system. For this reason, it is the default networking mode in VirtualBox. A virtual machine with NAT enabled acts much like a real computer that connects to the Inter- net through a router. The “router”, in this case, is the VirtualBox networking engine, which maps traffic from and to the virtual machine transparently. The disadvantage of NAT mode is that, much like a private network behind a router, the virtual machine is invisible and unreachable from the outside internet you cannot run a server this way unless you set up port forwarding (described below). The network frames sent out by the guest operating system are received by VirtualBox’s NAT engine, which extracts the TCP/IP data and resends it using the host operating system. To an application on the host, or to another computer on the same network as the host, it looks like the data was sent by the VirtualBox application on the host, using an IP address belonging to the host. VirtualBox listens for replies to the packages sent, and repacks and resends them to the guest machine on its private network. The virtual machine receives its network address and configuration on the private network from a DHCP server integrated into VirtualBox. The IP address thus assigned to the virtual machine is usually on a completely different network than the host. As more than one card of a virtual machine can be set up to use NAT, the first card is connected to the private network 10.0.2.0, the second card to the network 10.0.3.0 and so on. If you need to change the guest- assigned IP range for some reason, please refer to chapter 9.10, Fine-tuning the VirtualBox NAT engine, page 146. 6.3.1 Configuring port forwarding with NAT As the virtual machine is connected to a private network internal to VirtualBox and invisible to the host, network services on the guest are not accessible to the host machine or to other computers on the same network. However, like a physical router, VirtualBox can make selected services available to the world outside the guest through port forwarding. This means that VirtualBox listens to certain ports on the host and resends all packets which arrive there to the guest, on the same or a different port. To an application on the host or other physical (or virtual) machines on the network, it looks as though the service being proxied is actually running on the host. This also means that you cannot run the same service on the same ports on the host. However, you still gain the advantages of running the service in a virtual machine – for example, services on the host machine or on other virtual machines cannot be compromised or crashed by a vulnerability or a bug in the service, and the service can run in a different operating system than the host system. You can set up a guest service which you wish to proxy using the command line tool VBoxManage for details, please refer to chapter 8.7, VBoxManage modifyvm, page 109. You will need to know which ports on the guest the service uses and to decide which ports to use on the host (often but not always you will want to use the same ports on the guest and on the host). You can use any ports on the host which are not already in use by a service. For example, to set up incoming NAT connections to an ssh server in the guest, use the following command: VBoxManage modifyvm "VM name" --natpf1 "guestssh,tcp,,2222,,22" With the above example, all TCP traffic arriving on port 2222 on any host interface will be forwarded to port 22 in the guest. The protocol name tcp is a mandatory attribute defining which protocol should be used for forwarding (udp could also be used). The name guestssh is purely descriptive and will be auto-generated if omitted. The number after --natpf denotes the network card, like in other parts of VBoxManage. To remove this forwarding rule again, use the following command: 85
Purchased from Demo (abedemo.tizrapublisher.com) for the exclusive use of unknown.
© 2026 Demo. Please report unauthorized use to pirate@tizra.com